Open SitePins
Go to pins.bunkersync.com. You can try the live demo (two sample maps — no uploads/photos) or start a free 30-day trial with no payment required. Add to your home screen for quick access.
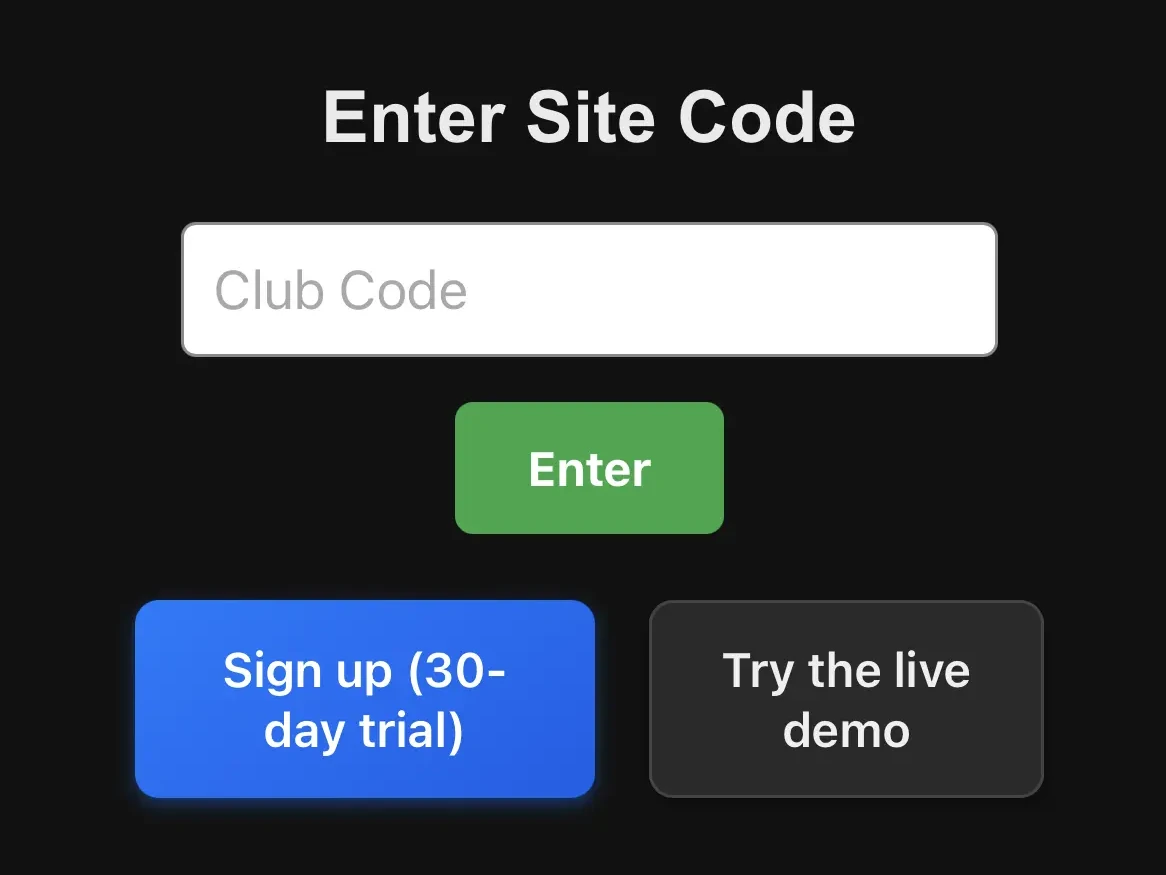
Create or Join a Site
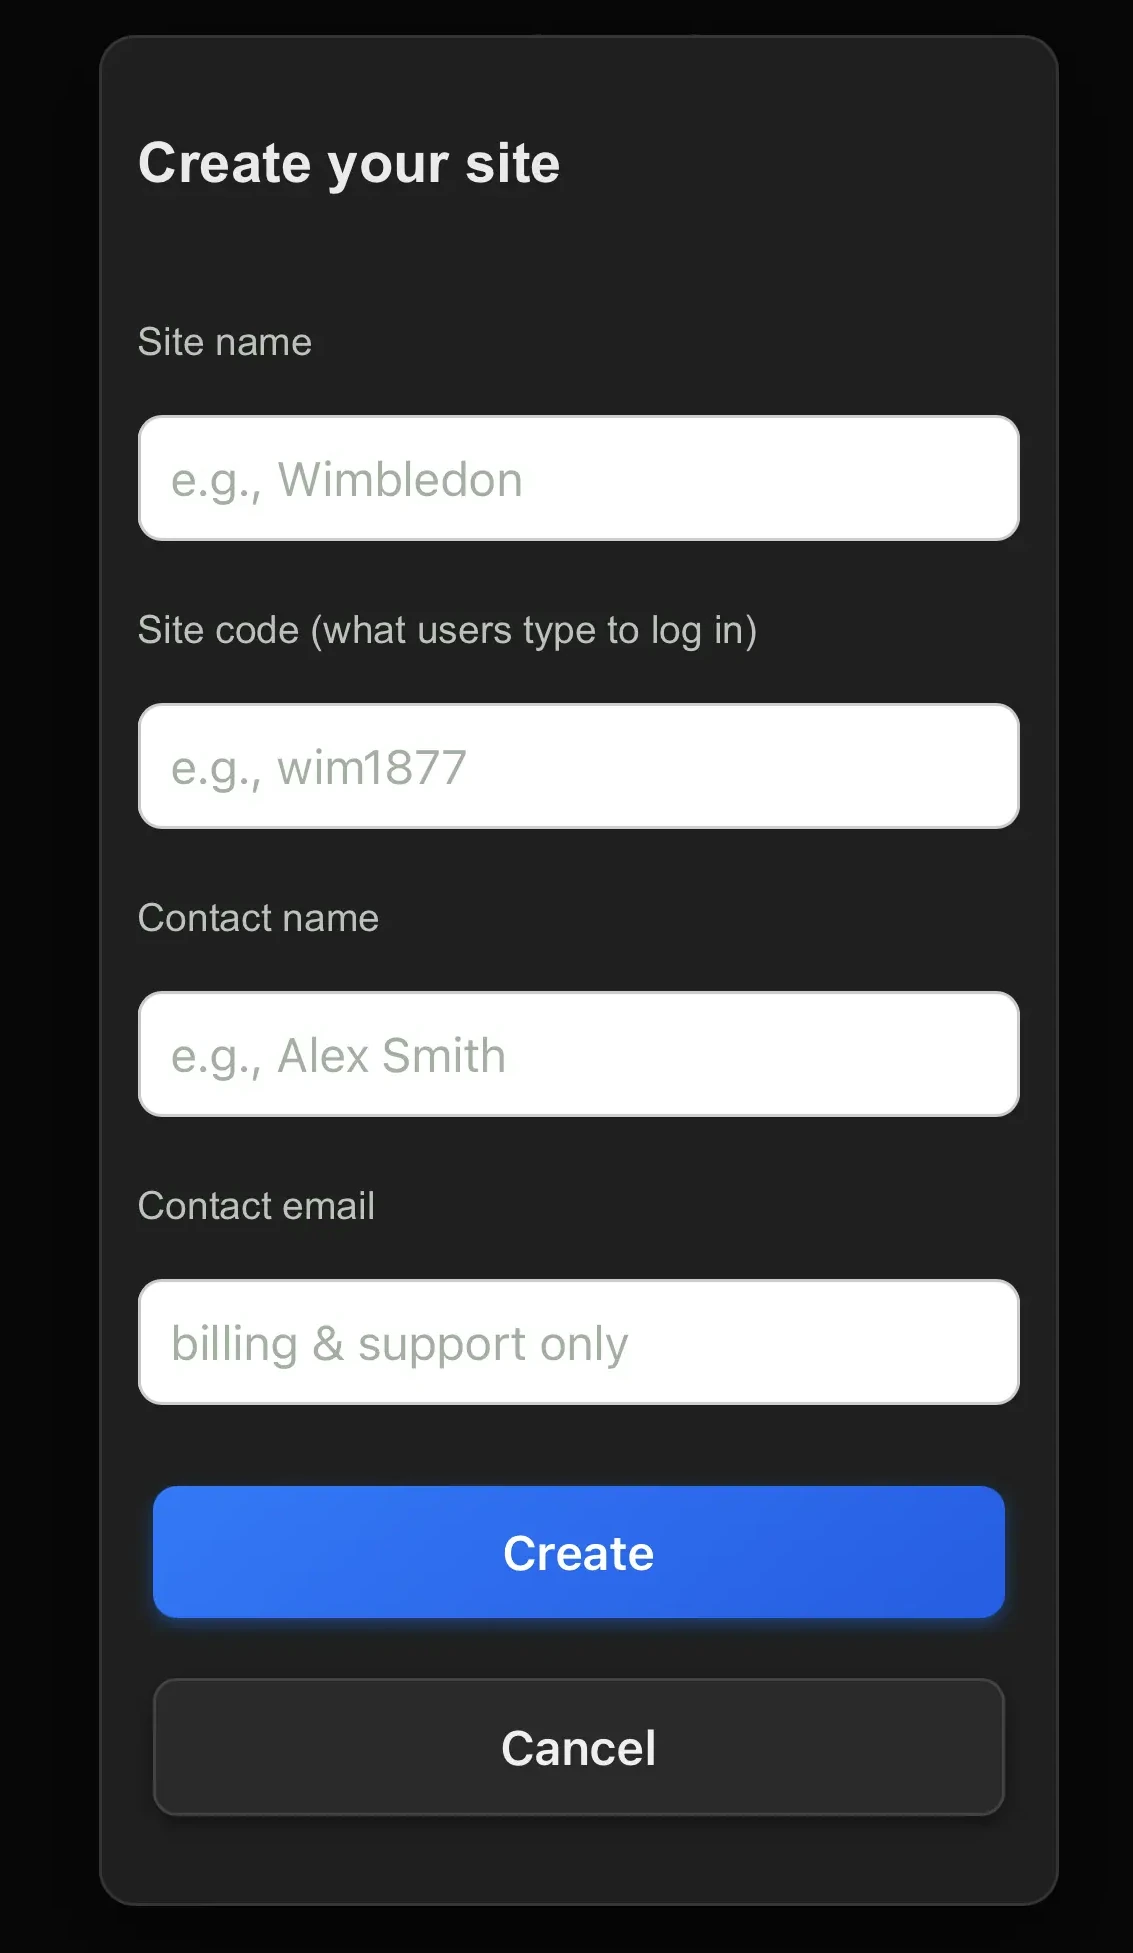
On sign-up, choose a Site name and a Site code (used to log in). Enter your contact name and email, then tap Create. Use your site code to log in anytime.
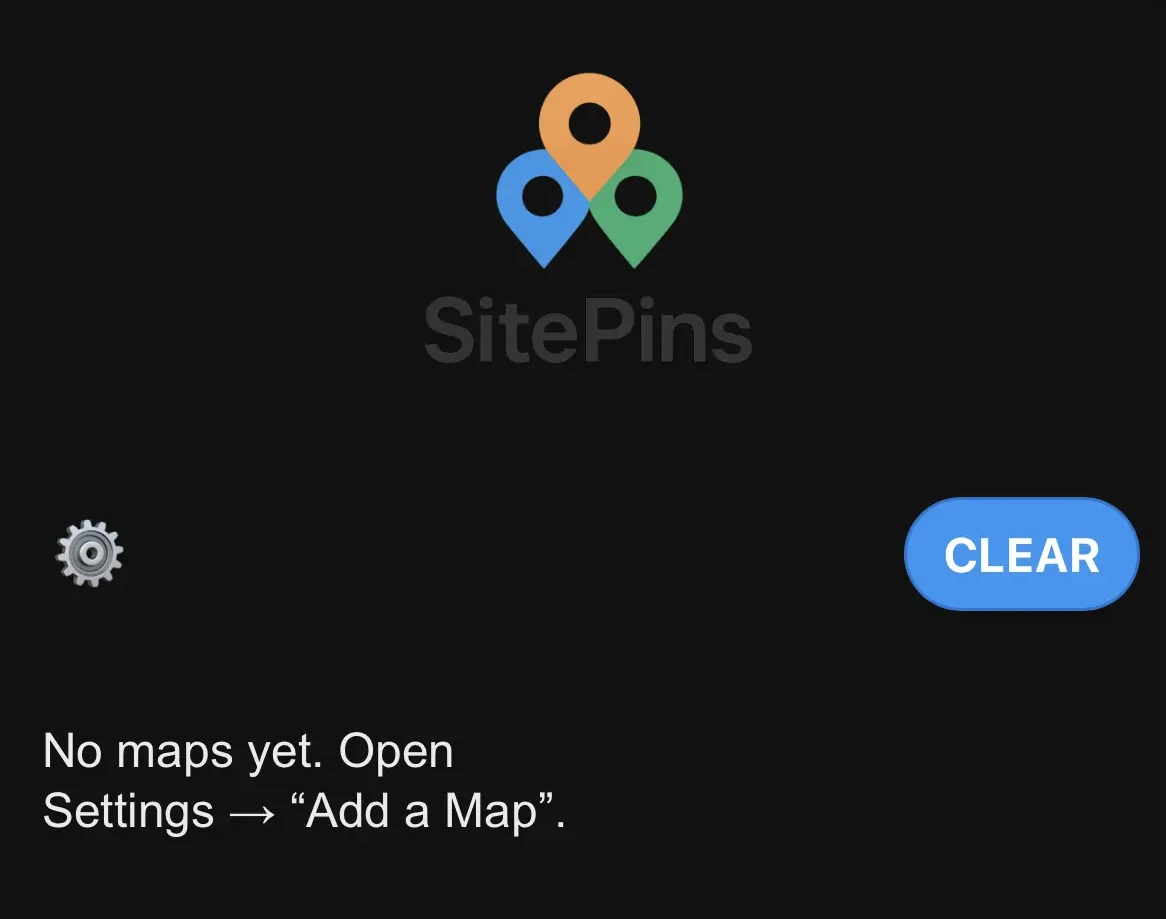
Home Screen
Your home screen shows the map tiles for your site. To start adding maps, tap the settings cog in the corner.
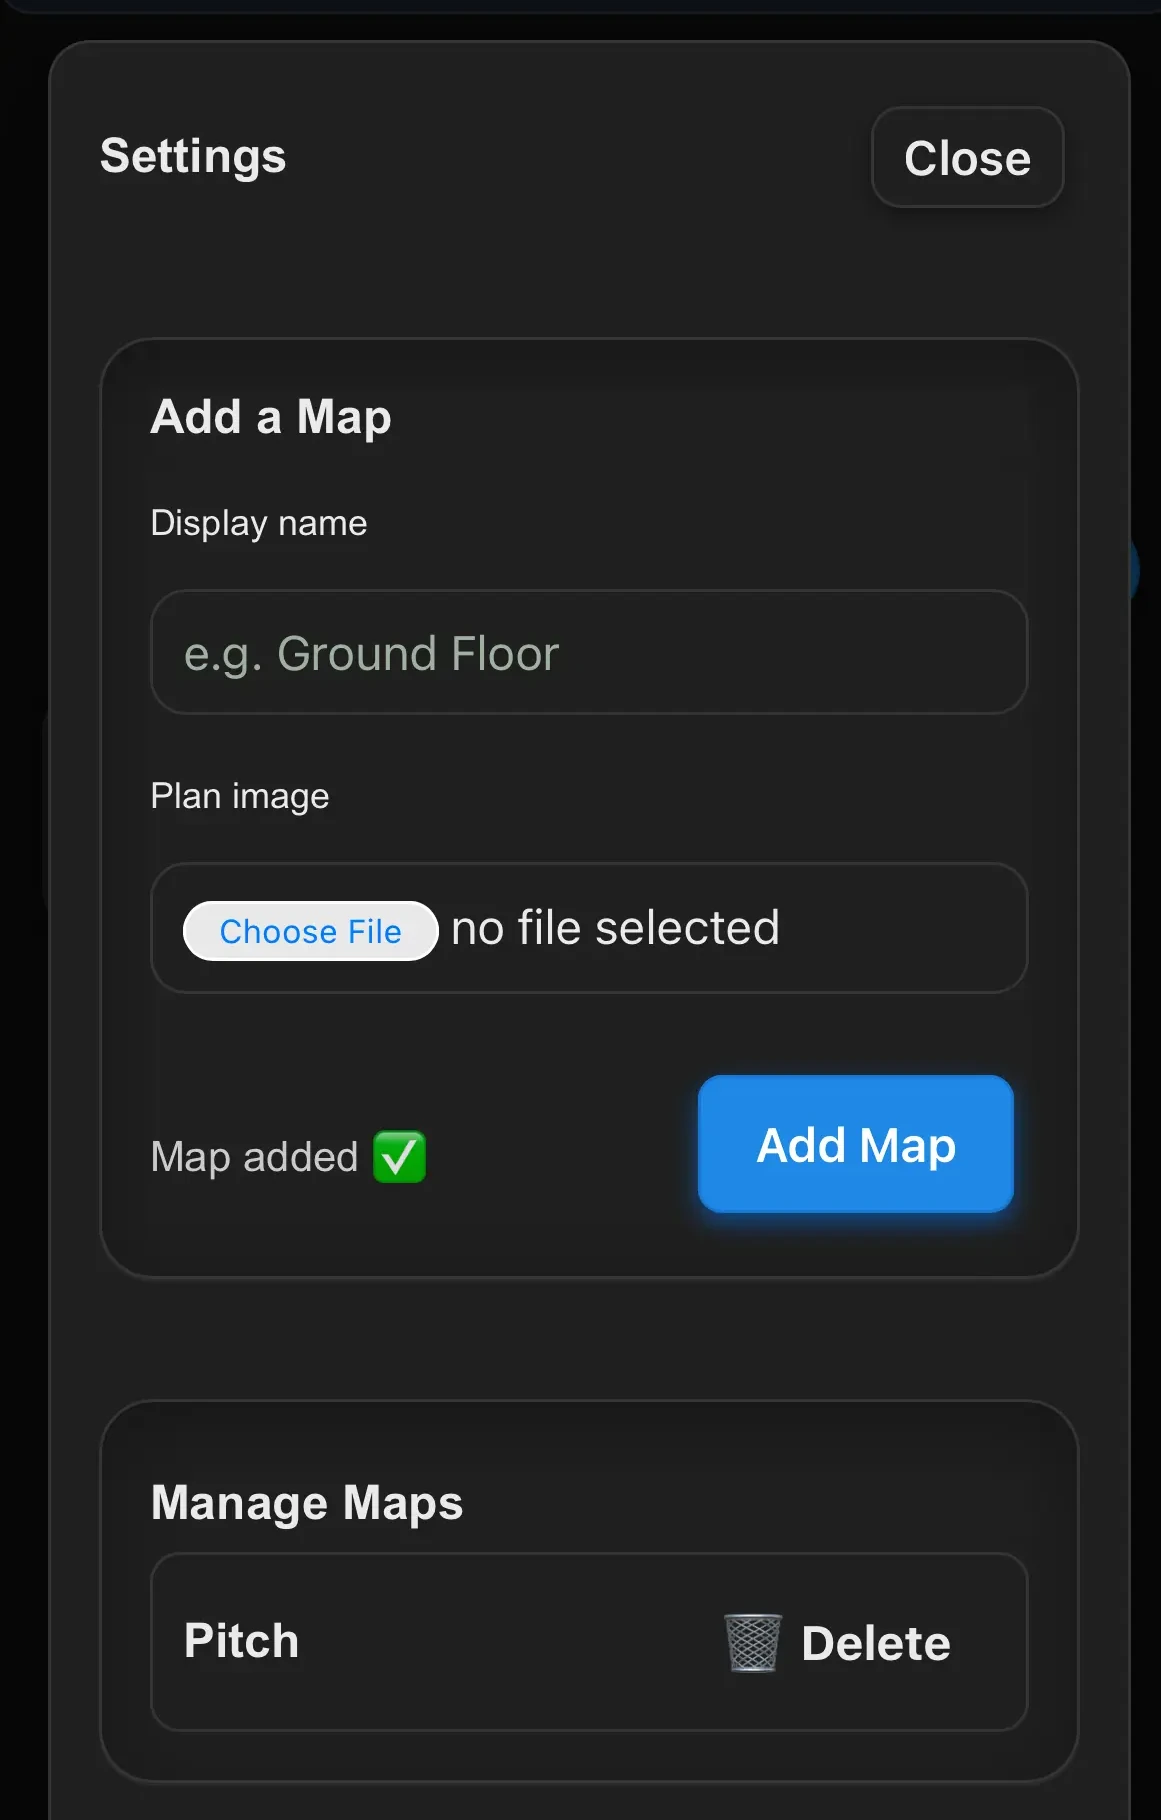
Add or Manage Maps
In Settings → Add a Map, enter a display name and upload an image or plan. Maps you add appear as tiles on your home screen. You can also delete old maps here.
Open a Map
Tap any map tile to open it. Rotate or zoom depending on the map size. You can drop pins anywhere on the image to record tasks or snags.

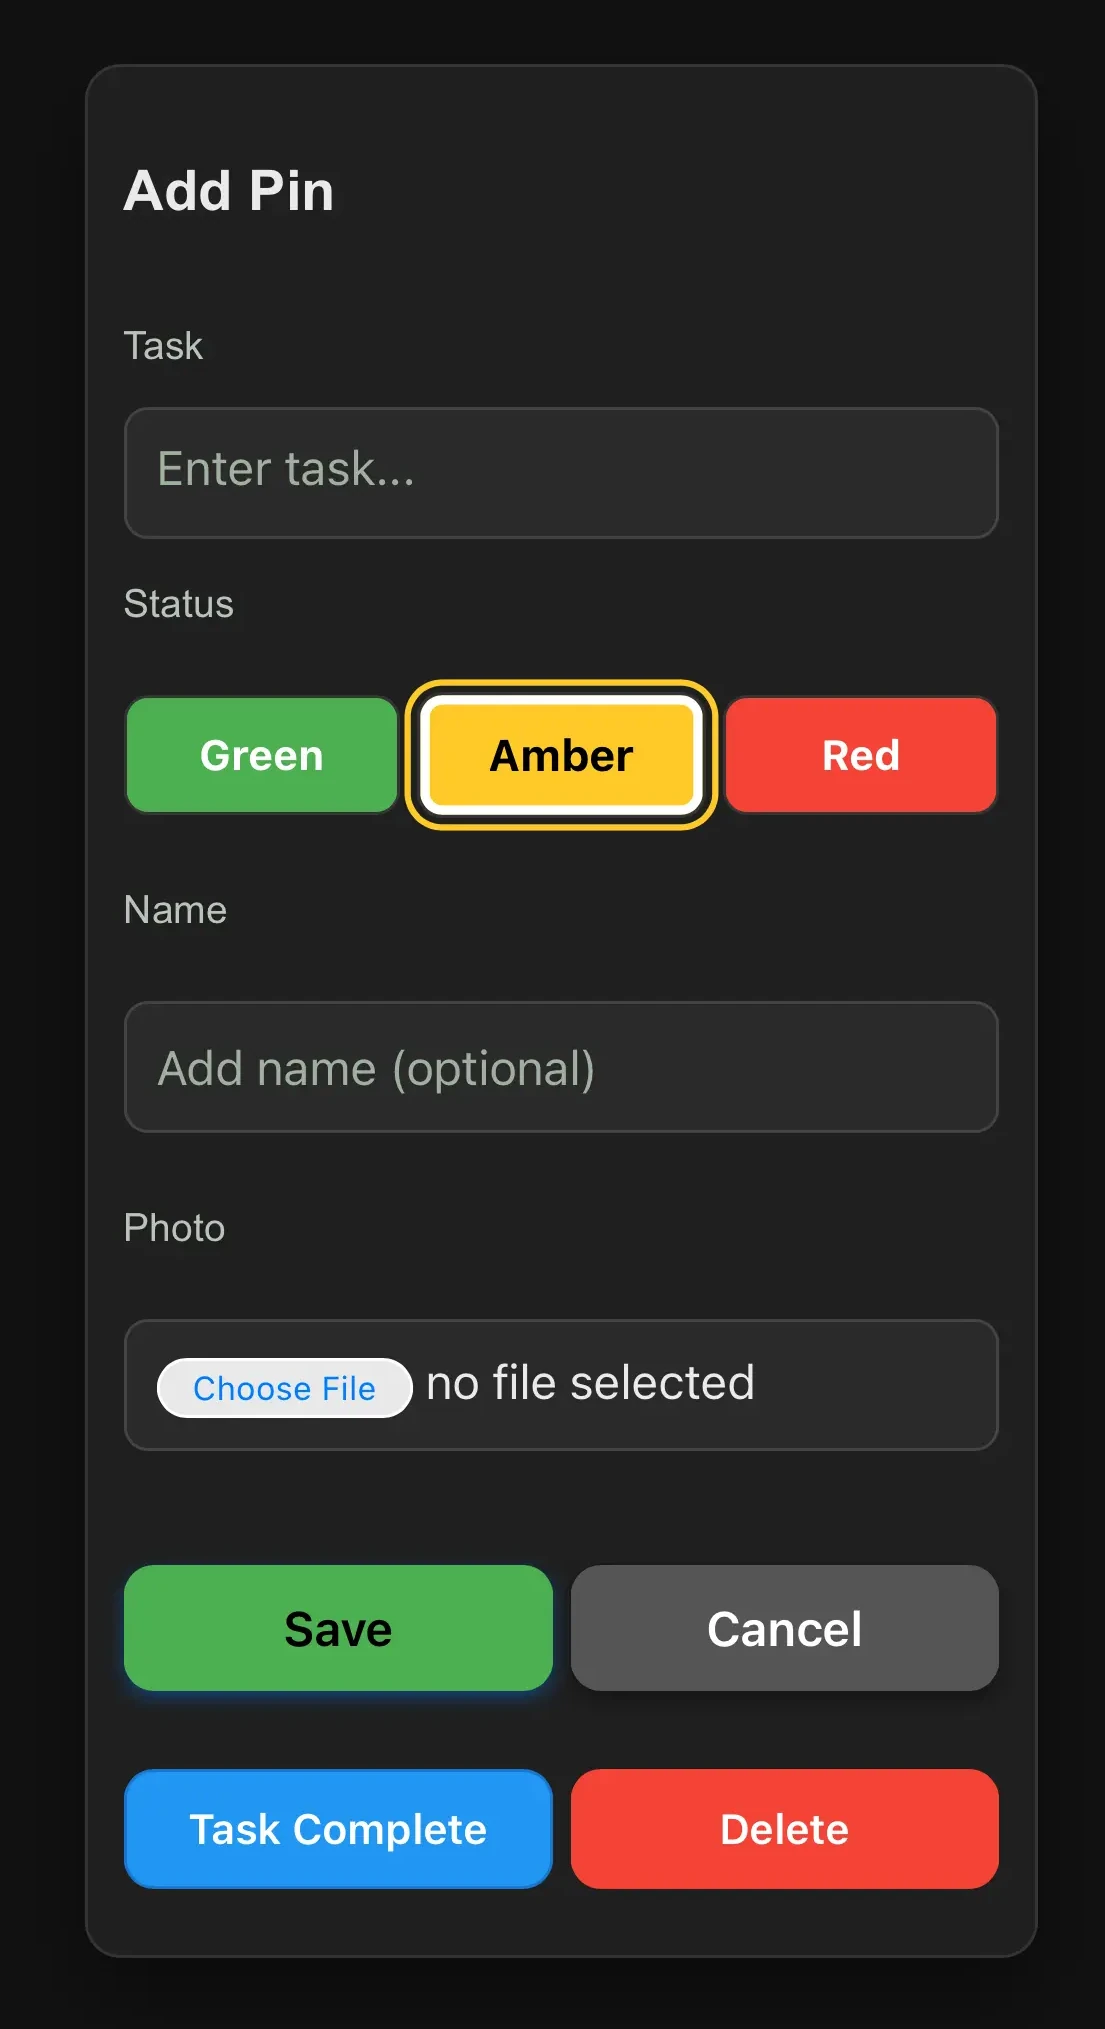
Add a Pin
Tap on the map to add a pin. Enter a task name, select a status colour (Green, Amber, Red), optionally add a name or photo, then tap Save.
View and Update Pins
Completed tasks can be marked Task Complete which turns the pin blue. You can clear completed pins per map or clear all site-wide using the Clear button on the home screen.

Home Screen Overview
Each map tile displays its overall pin statuses so you can see what needs attention at a glance. Tap Subscribe anytime to activate the £10/month plan and keep full access beyond the trial.